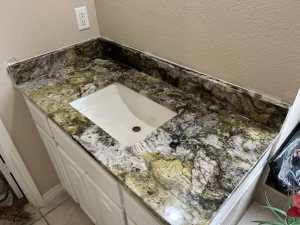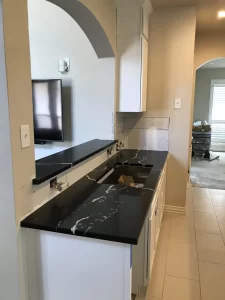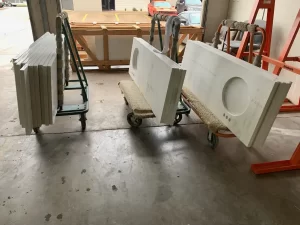
Stone countertop installation requires careful planning and professional expertise to ensure your new surfaces look beautiful and perform well for years. Homeowners in the Dallas area often choose natural stone options like granite for kitchens and baths, and understanding the professional process helps set realistic expectations from templating through final sealing.
Table of contents
- The professional stone countertop installation process
- Site preparation homeowners must complete
- Templating and measurement details
- Fabrication steps at the shop
- What happens on installation day
- Post-installation considerations
- Selecting the right local fabricator
- FAQ
The professional stone countertop installation process
Professional stone countertop installation follows a structured sequence that begins long before any slabs arrive at your home. Fabricators first review your cabinet layout, sink models, and appliance specifications to confirm compatibility. They then create precise templates that account for every seam, overhang, and cutout. This step reduces surprises and ensures the final fit meets both aesthetic and functional needs.
Once templates are approved, the material moves into fabrication where edges receive their finished profiles and any required cutouts are completed with water jets or CNC equipment. Delivery and setting happen on a single day in most residential projects, with installers leveling the stone on your cabinets and applying seam filler where needed. Homeowners benefit from staying involved at key decision points rather than attempting any portion of the work themselves.
Site preparation homeowners must complete
Before the installation crew arrives, cabinets must be securely fastened to the floor and walls with no movement under load. Countertop support brackets or ledger strips should already be in place if your design includes large overhangs for seating. Plumbing and electrical rough-ins for sinks, dishwashers, and cooktops need to be positioned correctly so they align with the final stone cutouts.
Clear the workspace of all appliances, base cabinets that will be replaced, and any flooring that might be damaged during transport. Provide clear access paths from the driveway to the kitchen or bath, including removal of doors if necessary. These preparations allow the crew to focus on precise placement rather than site cleanup.
Templating and measurement details
Templating occurs after cabinets are installed and leveled. Technicians use digital or physical templates to capture every dimension, including wall irregularities, window sills, and existing tile or backsplash heights. They also mark the exact locations for sinks, cooktops, and faucet holes so the fabricator can complete those openings in the controlled shop environment.
During this visit, discuss edge profiles, seam placement, and any special features such as integrated drainboards or mitered edges. Confirm the material selection matches the approved slab and note any veining direction preferences. Accurate templating prevents costly delays later in the project.
Fabrication steps at the shop
After templating, the selected slab moves to the fabrication area where it is cut to size using bridge saws and water jet technology. Edge profiles are then shaped and polished to the agreed specification, whether eased, bevel, or more decorative options. Cutouts for sinks and appliances receive their final shaping and any necessary reinforcement.
Seams are planned to minimize visibility while maintaining structural integrity. The fabricator applies a final inspection to each piece before scheduling delivery. This controlled process ensures consistency that field cutting cannot match.
What happens on installation day
Installation crews arrive with the pre-fabricated pieces, leveling tools, and seam kits. They set each section onto the cabinets, check for level in multiple directions, and make micro-adjustments using shims where needed. Once positioned, they secure the stone with adhesive and silicone at the perimeter.
Seams receive color-matched epoxy that is allowed to cure before final polishing. Sinks and cooktops are lowered into their openings and sealed from below. The crew then cleans the surfaces and reviews basic care instructions with the homeowner before leaving.
Post-installation considerations
Allow the recommended cure time before placing heavy items or using the sink. Most fabricators advise waiting 24 to 48 hours before full use. Apply a penetrating sealer if your stone requires it, following the product instructions for reapplication intervals.
Monitor the surface for any movement or settling over the first few weeks. Contact your fabricator promptly if you notice issues rather than attempting repairs yourself. Proper care after professional installation preserves the warranty and appearance of the stone.
Selecting the right local fabricator
Choose a fabricator with a dedicated shop, experienced templating team, and clear communication about timelines. Review their portfolio of completed residential projects in neighborhoods such as Dallas, TX and surrounding communities. Ask to see recent installations that match your material and edge preferences.
Request a written scope that covers templating, fabrication, delivery, installation, and any follow-up sealing. Confirm they handle both Residential and light commercial work so they understand typical home layouts. Starting the conversation early allows time to coordinate with cabinet and appliance deliveries.
Ready to move forward with your project? Contact AA Granite Fabrication Center today at (214) 441-7776 or submit details through our Request A Quote page.
FAQ
How long does the entire stone countertop installation take from templating to completion?
Most residential projects move from templating to installation in two to three weeks, depending on material availability and shop schedule. Complex layouts with multiple seams or special edges may require additional fabrication time.
What should I do if my cabinets are not perfectly level before templating?
Level the cabinets yourself or have your cabinet installer return to correct any issues. Fabricators require a stable, level base to ensure the stone sits flat without rocking or visible gaps.
Can seams be hidden completely during stone countertop installation?
Seams are part of any natural stone installation larger than a single slab. Skilled fabricators position them in low-visibility areas and use color-matched fillers, but some lines will remain visible under certain lighting.
Do I need to be home during the installation day?
Yes, plan to be present or have a designated representative available. Decisions about final placement, seam location, and sink positioning may arise, and you will need to sign off on the completed work.
Will my existing backsplash need to be removed before stone countertop installation?
In most cases the backsplash stays in place. The new countertop is installed first, then a new backsplash or matching material is added above it to cover the joint.